Kubernetes Autoscaling — Horizontal Pod Autoscaling(HPA), Vertical Pod Autoscaling(VPA) Using AWS EKS
HPA VS VPA.


Horizontal scaling means raising the amount of your instance. For example, adding new nodes to a cluster/pool. Or adding new pods by raising the replica count (Horizontal Pod Autoscaler).
Vertical scaling means raising the resources (like CPU or memory) of each node in the cluster (or in a pool). This is rarely possible without creating a completely new node pool. When it comes to pods though, vertical scaling would mean to dynamically adjust the resource requests and limits based on the current application needs (Vertical Pod Autoscaler).
Horizontal Pod Autoscaling(HPA)
1.HPA scales the number of pods in a replication controller, deployment, replica set, or stateful set based on CPU utilization. HPA can also be configured to make scaling decisions based on custom or external metrics.
2. This can help your applications scale out to meet increased demand or scale in when resources are not needed, thus freeing up your worker nodes for other applications.
3. you set a threshold to say for example if the CPU utilization goes 75% increase the number of replicas, that’s you horizontally scaling your application you’re adding more replicas to your existing application, and it autoscaled down when the CPU utilization drops below that threshold.
4. So in order to use horizontal pod autoscaling you have to have a matrics server in your cluster either hipster or metrics server.
- hipster is outdated so I’m gonna go with the metric server.
Install the metrics server
1. The Kubernetes metrics server is an aggregator of resource usage data in your cluster.
2. The metrics server is not deployed by default in Amazon EKS clusters, but it provides metrics like CPU utilization, memory utilization, disk I/O that are required by the Horizontal Pod Autoscaler.
To deploy the Metrics Server
1.Deploy the Metrics Server with the following command:
kubectl apply -f https://github.com/kubernetes-sigs/metrics-server/releases/download/v0.3.6/components.yaml
Output:


2. Verify that the
metrics-server deployment is running the desired number of pods with the following command.
kubectl get deployment metrics-server -n kube-system


To test your Horizontal Pod Autoscaler installation
1. Create a simple Apache webserver application with the following command.
kubectl run httpd --image=httpd --requests=cpu=100m --limits=cpu=200m
Output:


2. Create a Horizontal Pod Autoscaler resource for the
httpd deployment.
2 way of doing this
- We can run it as a comment
kubectl autoscale deployment httpd --cpu-percent=50 --min=1 --max=10


2. Run it as a yaml file.
Create a hpa.yaml file.
apiVersion: autoscaling/v1
kind: HorizontalPodAutoscaler
metadata:
name: httpd
spec:
maxReplicas: 10
minReplicas: 1
scaleTargetRef:
apiVersion: extensions/v1beta1
kind: Deployment
name: hppd
targetCPUUtilizationPercentage: 50
kind: HorizontalPodAutoscaler
metadata:
name: httpd
spec:
maxReplicas: 10
minReplicas: 1
scaleTargetRef:
apiVersion: extensions/v1beta1
kind: Deployment
name: hppd
targetCPUUtilizationPercentage: 50
- deploy it using below comment:
kubectl create -f <filename.yaml>
- This command creates an autoscaler that targets 50 percent CPU utilization for the deployment, with a minimum of one pod and a maximum of ten pods.
- When the average CPU load is below 50 percent, the autoscaler tries to reduce the number of pods in the deployment, to a minimum of one. When the load is greater than 50 percent, the autoscaler tries to increase the number of pods in the deployment, up to a maximum of ten.
3. Describe the autoscaler with the following command to view its details.
kubectl describe hpa/httpd
As you see on the output the current CPU load is 1%.


4. Create a load for the webserver. The following command uses the Apache Bench program to send hundreds of thousands of requests to the
httpd server. This should significantly increase the load and cause the autoscaler to scale out the deployment.kubectl run apache-bench -i --tty --rm --image=httpd -- ab -n 500000


5. Watch the
httpd deployment scale out while the load is generated. To watch the deployment and the autoscaler, periodically run the following command.kubectl get horizontalpodautoscaler.autoscaling/httpd


6.when the load is increased and goes above 50%(targercpuutlization) horizontal pod autoscaler tries to increase the number of pods in the deployment, up to a maximum of ten.
In the output, we see the 10 https pod(replicas) is created by HPA, When the load finishes, the deployment should scale back down to 1.
Output:


Vertical Pod Autoscaling
1. Vertical scaling means raising the resources (like CPU or memory) of each node in the cluster (or in a pool).
2. This is rarely possible without creating a completely new node pool. When it comes to pods though, vertical scaling would mean to dynamically adjust the resource requests and limits based on the current application needs (Vertical Pod Autoscaler).
VPA components
VPA Recommender
The Recommender looks at the metric history, OOM events, and the VPA spec of deployment and suggests fitting values for requests (and limits). Hence the Recommender could just be used by itself if one is unsure what the application actually needs. Further down we see resource suggestions for our example app.
VPA Auto Adjuster
Whatever the Recommender will recommend, the Adjuster will implement if the
updateMode: Auto is defined.Example
Install the metrics server
1.Deploy the Metrics Server with the following command:
kubectl apply -f https://github.com/kubernetes-sigs/metrics-server/releases/download/v0.3.6/components.yaml
Output:


2.Verify that the
metrics-server deployment is running the desired number of pods with the following command.
kubectl get deployment metrics-server -n kube-system


3. we can also see how metrics server provides metrics like CPU utilization, memory utilization, using following comment.
kubectl top nodes


Deploy the Vertical Pod Autoscaler
- Clone the kubernetes/autoscaler GitHub repository.
git clone https://github.com/kubernetes/autoscaler.git
Output:


2. Change to the
vertical-pod-autoscaler directory.cd autoscaler/vertical-pod-autoscaler/
Output:


3. Deploy the Vertical Pod Autoscaler to your cluster with the following command.
./hack/vpa-up.sh
Output:


4. Verify that the Vertical Pod Autoscaler pods have been created successfully.
kubectl get pods -n kube-system
Output:


Show you how it’s connected to your deployment.
- Deploy a php-apache application into the k8s.
vim apache.yaml
apiVersion: apps/v1
kind: Deployment
metadata:
name: php-apache
labels:
app: php-apache
spec:
replicas: 2
selector:
matchLabels:
app: php-apache
template:
metadata:
labels:
app: php-apache
spec:
containers:
— name: php-apache
image: k8s.gcr.io/hpa-example
ports:
— containerPort: 80
resources:
requests:
cpu: 50m
memory: 100Mi


2. Deploy the application using the following comment
kubectl create -f <filename.yaml>


3. Check the CPU and memory utilization of the pods
kubectl describe deployment <deploymentname>
- You see in the requests
CPU: 50m
memory: 100Mi


4. Deploy the VPA.
vpa.yaml file.
apiVersion: autoscaling.k8s.io/v1
kind: VerticalPodAutoscaler
metadata:
name: php-apache
spec:
targetRef:
apiVersion: “apps/v1”
kind: Deployment
name: php-apache
updatePolicy:
updateMode: “Auto”
kind: VerticalPodAutoscaler
metadata:
name: php-apache
spec:
targetRef:
apiVersion: “apps/v1”
kind: Deployment
name: php-apache
updatePolicy:
updateMode: “Auto”
- Change the “php-apache” with your deployment name.


5. After deployment of VPA, describe the VPA.
kubectl describe vpa
- and you see Recommendation, VPA recommended you the Target CPU,memory value for your pod.


6. In the vpa.yaml file, we set updateMode: “Auto”
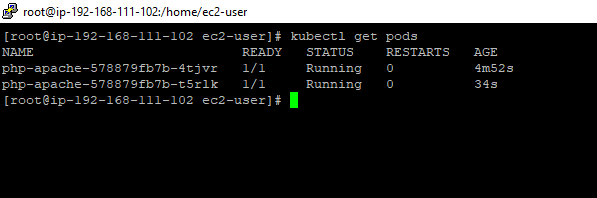
so VPA launches a new pod with Target CPU and Memory value , and terminated old one.
- In the Output, you see the new pod is created 34s ago, with new CPU and Memory value.

7. When we describe the newly created pod we see the CPU and Memory requested value is a change to Target value set by VPA.
- In the output, you see the
Requests(BeforeVPA):
CPU: 50m
memory: 100Mi
Requests(AfterVPA):
CPU: 25m
memory: 262144k


Comments
Post a Comment